Let’s Make an Astronomy Picture of the Day JupyterLab Extension
JupyterLab extensions add features to the user experience. This page describes how to create one type of extension, an application plugin, that:
- Adds a “Random Astronomy Picture” command to the command palette sidebar
- Fetches the image and metadata when activated
- Shows the image and metadata in a tab panel
By working through this tutorial, you’ll learn:
- How to set up an extension development environment from scratch on a Linux or OSX machine. (You’ll need to modify the commands slightly if you are on Windows.)
- How to start an extension project from jupyterlab/extension-cookiecutter-ts
- How to iteratively code, build, and load your extension in JupyterLab
- How to version control your work with git
- How to release your extension for others to enjoy
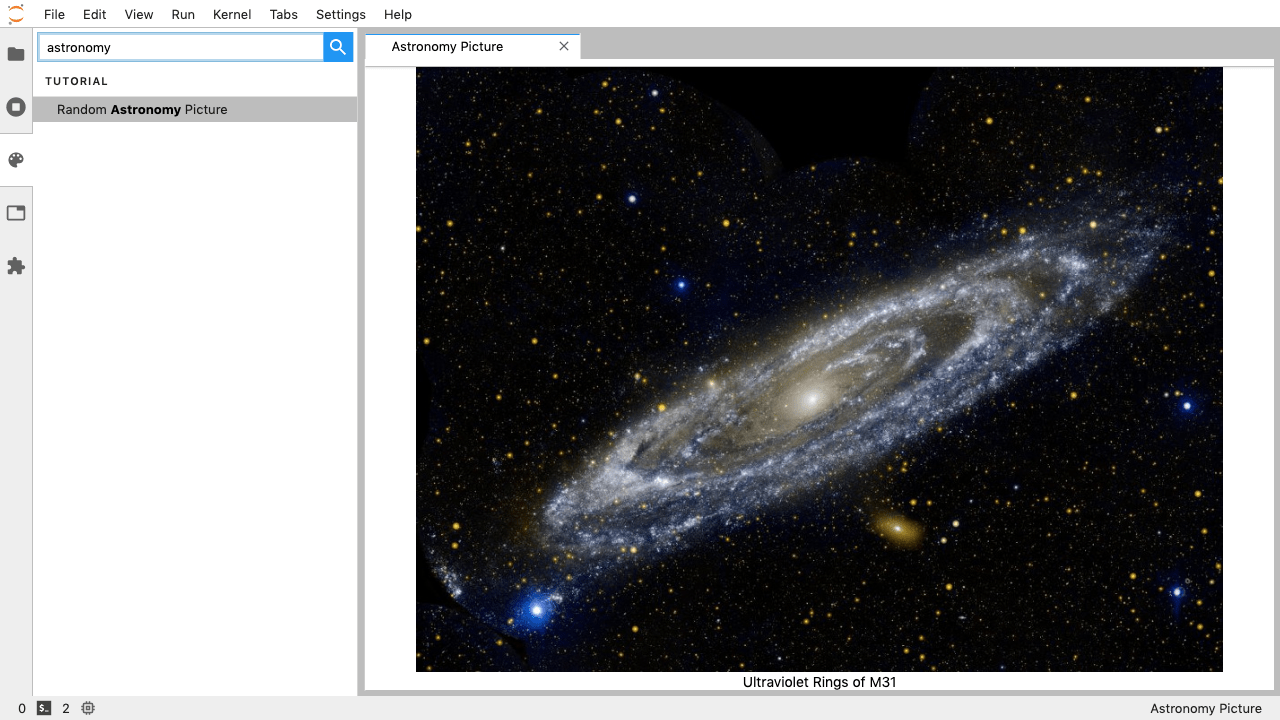
The completed extension, showing the Astronomy Picture of the Day for 24 Jul 2015.
Sound like fun? Excellent. Here we go!
Set up a development environment
Install conda using miniconda
Start by installing miniconda, following Conda’s installation documentation.
Install NodeJS, JupyterLab, etc. in a conda environment
Next create a conda environment that includes:
- the latest release of JupyterLab
- cookiecutter, the tool you’ll use to bootstrap your extension project structure (this is a Python tool which we’ll install using conda below).
- NodeJS, the JavaScript runtime you’ll use to compile the web assets (e.g., TypeScript, CSS) for your extension
- git, a version control system you’ll use to take snapshots of your work as you progress through this tutorial
It’s a best practice to leave the root conda environment (i.e., the environment created
by the miniconda installer) untouched and install your project-specific
dependencies in a named conda environment. Run this command to create a
new environment named jupyterlab-ext.
conda create -n jupyterlab-ext --override-channels --strict-channel-priority -c conda-forge -c anaconda jupyterlab cookiecutter nodejs git
Now activate the new environment so that all further commands you run work out of that environment.
conda activate jupyterlab-ext
Note: You’ll need to run the command above in each new terminal you open
before you can work with the tools you installed in the
jupyterlab-ext environment.
Note: if you have an older version of JupyterLab previously installed, you may need to update the version of JupyterLab manually.
conda install -c conda-forge jupyterlab=2
Create a repository
Create a new repository for your extension (see, for example, the GitHub instructions. This is an optional step, but highly recommended if you want to share your extension.
Create an extension project
Initialize the project from a cookiecutter
Next use cookiecutter to create a new project for your extension. This will create a new folder for your extension in your current directory.
cookiecutter https://github.com/jupyterlab/extension-cookiecutter-ts
When prompted, enter values like the following for all of the cookiecutter
prompts (apod stands for Astronomy Picture of the Day, the NASA service we
are using to fetch pictures).
author_name []: Your Name
extension_name [myextension]: jupyterlab_apod
project_short_description [A JupyterLab extension.]: Show a random NASA Astronomy Picture of the Day in a JupyterLab panel
has_server_extension [n]: n
repository [https://github.com/my_name/myextension]: https://github.com/my_name/jupyterlab_apod
Note: if not using a repository, leave the repository field blank. You can come
back and edit the repository field in the package.json file later.
Change to the directory the cookiecutter created and list the files.
cd jupyterlab_apod
ls
You should see a list like the following.
LICENSE README.md package.json src style tsconfig.json
Build and install the extension for development
Your new extension project has enough code in it to see it working in your JupyterLab. Run the following commands to install the initial project dependencies and install it in the JupyterLab environment. We defer building since it will be built in the next step.
Note
This tutorial uses jlpm to install Javascript packages and
run build commands, which is JupyterLab’s bundled
version of yarn. If you prefer, you can use another Javascript
package manager like npm or yarn itself.
jlpm install
jupyter labextension install . --no-build
After the install completes, open a second terminal. Run these commands
to activate the jupyterlab-ext environment and to start a JupyterLab
instance in watch mode so that it will keep up with our changes as we
make them.
conda activate jupyterlab-ext
jupyter lab --watch
See the initial extension in action
After building with your extension, JupyterLab should open in your default web browser.
In that browser window, open the JavaScript console by following the instructions for your browser:
After you reload the page with the console open, you should see a message that says
JupyterLab extension jupyterlab_apod is activated! in the console.
If you do, congratulations, you’re ready to start modifying the extension!
If not, go back make sure you didn’t miss a step, and reach
out if you’re stuck.
Note: Leave the terminal running the jupyter lab --watch command
open.
Commit what you have to git
Run the following commands in your jupyterlab_apod folder to
initialize it as a git repository and commit the current code.
git init
git add .
git commit -m 'Seed apod project from cookiecutter'
Note: This step is not technically necessary, but it is good practice to
track changes in version control system in case you need to rollback to
an earlier version or want to collaborate with others. For example, you
can compare your work throughout this tutorial with the commits in a
reference version of jupyterlab_apod on GitHub at
https://github.com/jupyterlab/jupyterlab_apod.
Add an Astronomy Picture of the Day widget
Show an empty panel
The command palette is the primary view of all commands available to you in JupyterLab. For your first addition, you’re going to add a Random Astronomy Picture command to the palette and get it to show an Astronomy Picture tab panel when invoked.
Fire up your favorite text editor and open the src/index.ts file in
your extension project. Change the import at the top of the file to get
a reference to the command palette interface and the Jupyter front end.
import {
  JupyterFrontEnd, JupyterFrontEndPlugin
} from '@jupyterlab/application';

import {
  ICommandPalette
} from '@jupyterlab/apputils';
Locate the extension object of type JupyterFrontEndPlugin. Change the
definition so that it reads like so:
/**
 * Initialization data for the jupyterlab_apod extension.
 */
const extension: JupyterFrontEndPlugin<void> = {
  id: 'jupyterlab-apod',
  autoStart: true,
  requires: [ICommandPalette],
  activate: (app: JupyterFrontEnd, palette: ICommandPalette) => {
    console.log('JupyterLab extension jupyterlab_apod is activated!');
    console.log('ICommandPalette:', palette);
  }
};
The requires attribute states that your plugin needs an object that
implements the ICommandPalette interface when it starts. JupyterLab
will pass an instance of ICommandPalette as the second parameter of
activate in order to satisfy this requirement. Defining
palette: ICommandPalette makes this instance available to your code
in that function. The second console.log line exists only so that
you can immediately check that your changes work.
Now you will need to install these dependencies. Run the following commands in the repository root folder to install the dependencies and save them to your package.json:
jlpm add @jupyterlab/apputils
jlpm add @jupyterlab/application
Finally, run the following to rebuild your extension.
jlpm run build
JupyterLab will rebuild after the extension does. You can
see it’s progress in the jupyter lab --watch window. After that
finishes, return to the browser tab that opened when you
started JupyterLab. Refresh it and look in the console. You should see
the same activation message as before, plus the new message about the
ICommandPalette instance you just added. If you don’t, check the output
of the build command for errors and correct your code.
JupyterLab extension jupyterlab_apod is activated!
ICommandPalette: Palette {_palette: CommandPalette}
Note that we had to run jlpm run build in order for the bundle to
update, because it is using the compiled JavaScript files in /lib.
If you wish to avoid running jlpm run build after each change, you
can open a third terminal, and run the jlpm run watch command from
your extension directory, which will automatically compile the
TypeScript files as they change.
Now return to your editor. Modify the imports at the top of the file to add a few more imports:
import {
  ICommandPalette, MainAreaWidget
} from '@jupyterlab/apputils';

import {
  Widget
} from '@lumino/widgets';
Install this new dependency as well:
jlpm add @lumino/widgets
Then modify the activate function again so that it has the following
code:
activate: (app: JupyterFrontEnd, palette: ICommandPalette) => {
  console.log('JupyterLab extension jupyterlab_apod is activated!');

  // Create a blank content widget inside of a MainAreaWidget
  const content = new Widget();
  const widget = new MainAreaWidget({content});
  widget.id = 'apod-jupyterlab';
  widget.title.label = 'Astronomy Picture';
  widget.title.closable = true;

  // Add an application command
  const command: string = 'apod:open';
  app.commands.addCommand(command, {
    label: 'Random Astronomy Picture',
    execute: () => {
      if (!widget.isAttached) {
        // Attach the widget to the main work area if it's not there
        app.shell.add(widget, 'main');
      }
      // Activate the widget
      app.shell.activateById(widget.id);
    }
  });

  // Add the command to the palette.
  palette.addItem({command, category: 'Tutorial'});
}
The first new block of code creates a MainAreaWidget instance with an empty
content Widget as its child. It also assigns the main area widget a unique
ID, gives it a label that will appear as its tab title, and makes the tab
closable by the user.
The second block of code adds a new command with id apod:open and label Random Astronomy Picture
to JupyterLab. When the command executes,
it attaches the widget to the main display area if it is not already
present and then makes it the active tab. The last new line of code uses the command id to add
the command to the command palette in a section called Tutorial.
Build your extension again using jlpm run build (unless you are using
jlpm run watch already) and refresh the browser tab. Open the command
palette on the left side by clicking on Commands and type Astronomy in
the search box. Your Random Astronomy Picture
command should appear. Click it or select it with the keyboard and press
Enter. You should see a new, blank panel appear with the tab title
Astronomy Picture. Click the x on the tab to close it and activate the
command again. The tab should reappear. Finally, click one of the
launcher tabs so that the Astronomy Picture panel is still open but no longer
active. Now run the Random Astronomy Picture command one more time. The
single Astronomy Picture tab should come to the foreground.
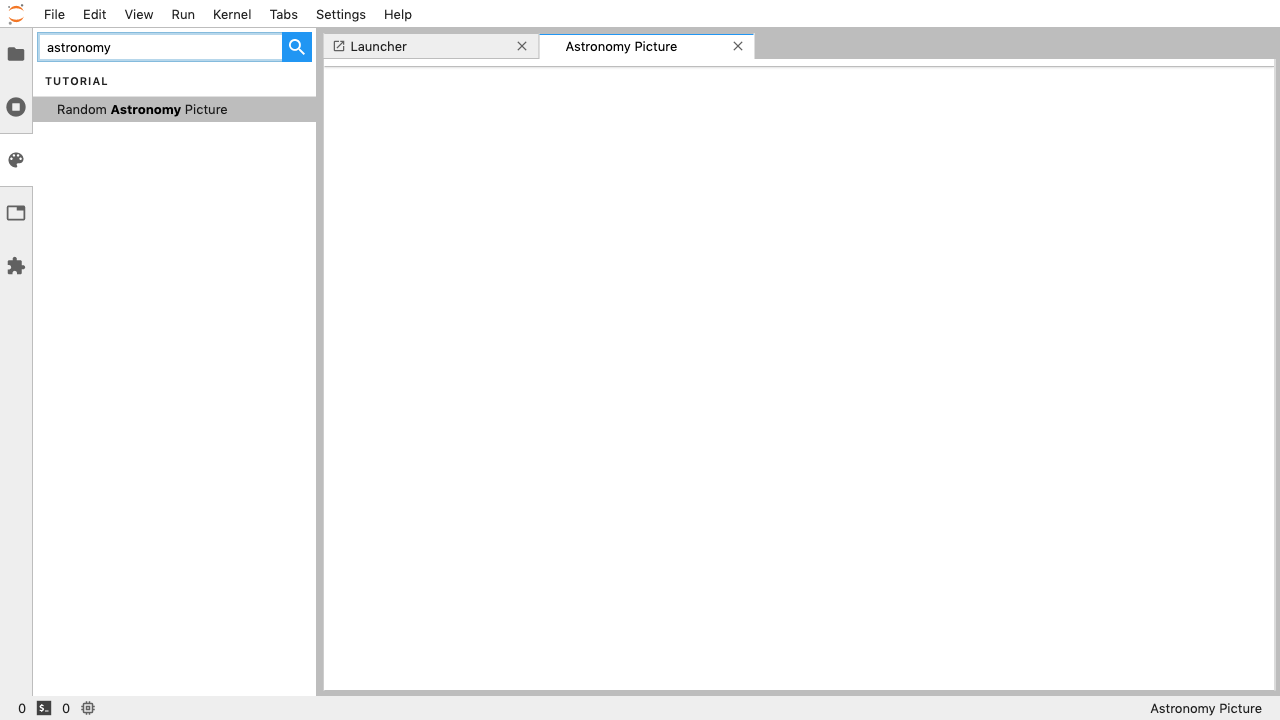
The in-progress extension, showing a blank panel.
If your widget is not behaving, compare your code with the reference project state at the 01-show-a-panel tag. Once you’ve got everything working properly, git commit your changes and carry on.
git add .
git commit -m 'Show Astronomy Picture command in palette'
Show a picture in the panel
You now have an empty panel. It’s time to add a picture to it. Go back to
your code editor. Add the following code below the lines that create a
MainAreaWidget instance and above the lines that define the command.
// Add an image element to the content
let img = document.createElement('img');
content.node.appendChild(img);

// Get a random date string in YYYY-MM-DD format
function randomDate() {
  const start = new Date(2010, 1, 1);
  const end = new Date();
  const randomDate = new Date(start.getTime() + Math.random()*(end.getTime() - start.getTime()));
  return randomDate.toISOString().slice(0, 10);
}

// Fetch info about a random picture
const response = await fetch(`https://api.nasa.gov/planetary/apod?api_key=DEMO_KEY&date=${randomDate()}`);
const data = await response.json() as APODResponse;

if (data.media_type === 'image') {
  // Populate the image
  img.src = data.url;
  img.title = data.title;
} else {
  console.log('Random APOD was not a picture.');
}
The first two lines create a new HTML <img> element and add it to
the widget DOM node. The next lines define a function get a random date in the form YYYY-MM-DD format, and then the function is used to make a request using the HTML
fetch
API that returns information about the Astronomy Picture of the Day for that date. Finally, we set the
image source and title attributes based on the response.
Now define the APODResponse type that was introduced in the code above. Put
this definition just under the imports at the top of the file.
interface APODResponse {
  copyright: string;
  date: string;
  explanation: string;
  media_type: 'video' | 'image';
  title: string;
  url: string;
};
And update the activate method to be async since we are now using
await in the method body.
activate: async (app: JupyterFrontEnd, palette: ICommandPalette) =>
Rebuild your extension if necessary (jlpm run build), refresh your browser
tab, and run the Random Astronomy Picture command again. You should now see a
picture in the panel when it opens (if that random date had a picture and not a
video).
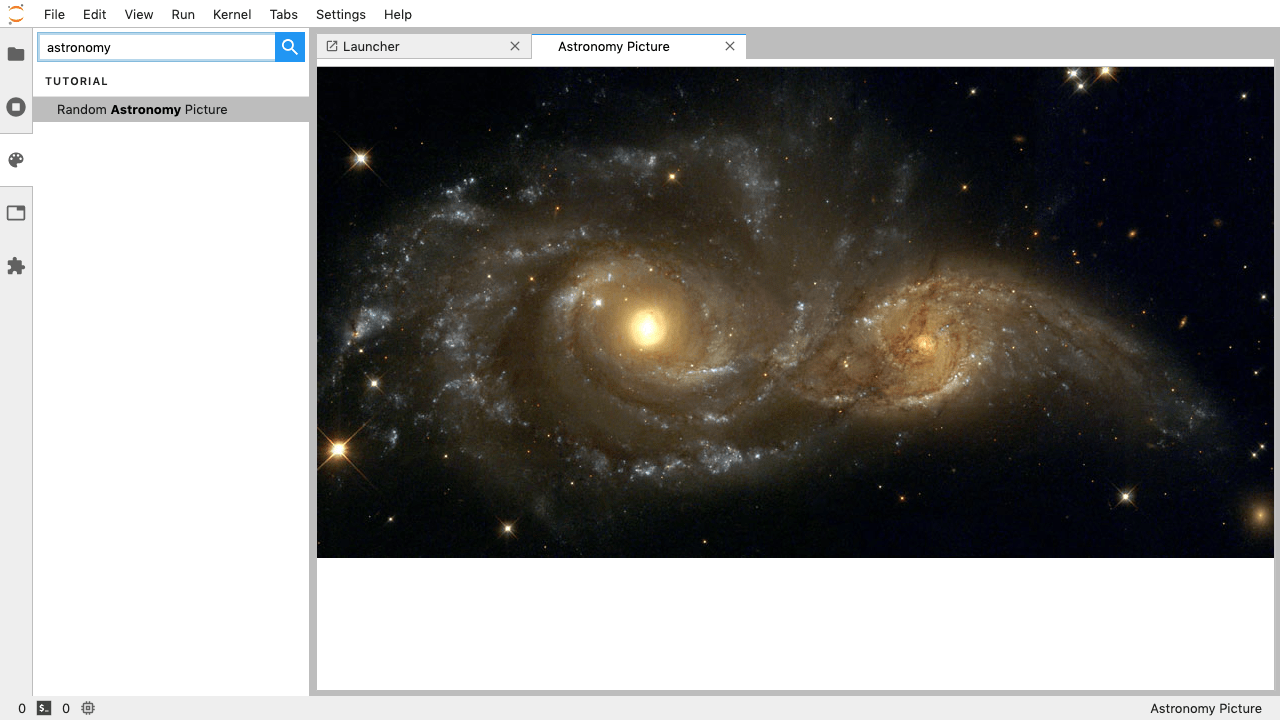
The in-progress extension, showing the Astronomy Picture of the Day for 19 Jan 2014.
Note that the image is not centered in the panel nor does the panel scroll if the image is larger than the panel area. Also note that the image does not update no matter how many times you close and reopen the panel. You’ll address both of these problems in the upcoming sections.
If you don’t see a image at all, compare your code with the 02-show-an-image tag in the reference project. When it’s working, make another git commit.
git add .
git commit -m 'Show a picture in the panel'
Improve the widget behavior
Center the image, add attribution, and error messaging
Open style/index.css in our extension project directory for editing.
Add the following lines to it.
.my-apodWidget {
  display: flex;
  flex-direction: column;
  align-items: center;
  overflow: auto;
}
This CSS stacks content vertically within the widget panel and lets the panel
scroll when the content overflows. This CSS file is included on the page
automatically by JupyterLab because the package.json file has a style
field pointing to it. In general, you should import all of your styles into a
single CSS file, such as this index.css file, and put the path to that CSS
file in the package.json file style field.
Return to the index.ts file. Modify the activate
function to apply the CSS classes, the copyright information, and error handling
for the API response.
The beginning of the function should read like the following:
activate: async (app: JupyterFrontEnd, palette: ICommandPalette) => {
  console.log('JupyterLab extension jupyterlab_apod is activated!');

  // Create a blank content widget inside of a MainAreaWidget
  const content = new Widget();
  content.addClass('my-apodWidget'); // new line
  const widget = new MainAreaWidget({content});
  widget.id = 'apod-jupyterlab';
  widget.title.label = 'Astronomy Picture';
  widget.title.closable = true;

  // Add an image element to the content
  let img = document.createElement('img');
  content.node.appendChild(img);

  let summary = document.createElement('p');
  content.node.appendChild(summary);

  // Get a random date string in YYYY-MM-DD format
  function randomDate() {
    const start = new Date(2010, 1, 1);
    const end = new Date();
    const randomDate = new Date(start.getTime() + Math.random()*(end.getTime() - start.getTime()));
    return randomDate.toISOString().slice(0, 10);
  }

  // Fetch info about a random picture
  const response = await fetch(`https://api.nasa.gov/planetary/apod?api_key=DEMO_KEY&date=${randomDate()}`);
  if (!response.ok) {
    const data = await response.json();
    if (data.error) {
      summary.innerText = data.error.message;
    } else {
      summary.innerText = response.statusText;
    }
  } else {
    const data = await response.json() as APODResponse;

    if (data.media_type === 'image') {
      // Populate the image
      img.src = data.url;
      img.title = data.title;
      summary.innerText = data.title;
      if (data.copyright) {
        summary.innerText += ` (Copyright ${data.copyright})`;
      }
    } else {
      summary.innerText = 'Random APOD fetched was not an image.';
    }
  }

// Keep all the remaining command lines the same
// as before from here down ...
Build your extension if necessary (jlpm run build) and refresh your
JupyterLab browser tab. Invoke the Random Astronomy Picture command and
confirm the image is centered with the copyright information below it. Resize
the browser window or the panel so that the image is larger than the
available area. Make sure you can scroll the panel over the entire area
of the image.
If anything is not working correctly, compare your code with the reference project 03-style-and-attribute tag. When everything is working as expected, make another commit.
git add .
git commit -m 'Add styling, attribution, error handling'
Show a new image on demand
The activate function has grown quite long, and there’s still more
functionality to add. Let’s refactor the code into two separate
parts:
- An
APODWidgetthat encapsulates the Astronomy Picture panel elements, configuration, and soon-to-be-added update behavior - An
activatefunction that adds the widget instance to the UI and decide when the picture should refresh
Start by refactoring the widget code into the new APODWidget class.
Add the following additional import to the top of the file.
import {
  Message
} from '@lumino/messaging';
Install this dependency:
jlpm add @lumino/messaging
Then add the class just below the definition of APODResponse in the index.ts
file.
class APODWidget extends Widget {
  /**
  * Construct a new APOD widget.
  */
  constructor() {
    super();

    this.addClass('my-apodWidget');

    // Add an image element to the panel
    this.img = document.createElement('img');
    this.node.appendChild(this.img);

    // Add a summary element to the panel
    this.summary = document.createElement('p');
    this.node.appendChild(this.summary);
  }

  /**
  * The image element associated with the widget.
  */
  readonly img: HTMLImageElement;

  /**
  * The summary text element associated with the widget.
  */
  readonly summary: HTMLParagraphElement;

  /**
  * Handle update requests for the widget.
  */
  async onUpdateRequest(msg: Message): Promise<void> {

    const response = await fetch(`https://api.nasa.gov/planetary/apod?api_key=DEMO_KEY&date=${this.randomDate()}`);

    if (!response.ok) {
      const data = await response.json();
      if (data.error) {
        this.summary.innerText = data.error.message;
      } else {
        this.summary.innerText = response.statusText;
      }
      return;
    }

    const data = await response.json() as APODResponse;

    if (data.media_type === 'image') {
      // Populate the image
      this.img.src = data.url;
      this.img.title = data.title;
      this.summary.innerText = data.title;
      if (data.copyright) {
        this.summary.innerText += ` (Copyright ${data.copyright})`;
      }
    } else {
      this.summary.innerText = 'Random APOD fetched was not an image.';
    }
  }

  /**
  * Get a random date string in YYYY-MM-DD format.
  */
  randomDate(): string {
    const start = new Date(2010, 1, 1);
    const end = new Date();
    const randomDate = new Date(start.getTime() + Math.random()*(end.getTime() - start.getTime()));
    return randomDate.toISOString().slice(0, 10);
  }
}
You’ve written all of the code before. All you’ve done is restructure it to use instance variables and move the image request to its own function.
Next move the remaining logic in activate to a new, top-level
function just below the APODWidget class definition. Modify the code
to create a widget when one does not exist in the main JupyterLab area
or to refresh the image in the existing widget when the command runs again.
The code for the activate function should read as follows after
these changes:
/**
* Activate the APOD widget extension.
*/
function activate(app: JupyterFrontEnd, palette: ICommandPalette) {
  console.log('JupyterLab extension jupyterlab_apod is activated!');

  // Create a single widget
  const content = new APODWidget();
  const widget = new MainAreaWidget({content});
  widget.id = 'apod-jupyterlab';
  widget.title.label = 'Astronomy Picture';
  widget.title.closable = true;

  // Add an application command
  const command: string = 'apod:open';
  app.commands.addCommand(command, {
    label: 'Random Astronomy Picture',
    execute: () => {
      if (!widget.isAttached) {
        // Attach the widget to the main work area if it's not there
        app.shell.add(widget, 'main');
      }
      // Refresh the picture in the widget
      content.update();
      // Activate the widget
      app.shell.activateById(widget.id);
    }
  });

  // Add the command to the palette.
  palette.addItem({ command, category: 'Tutorial' });
}
Remove the activate function definition from the
JupyterFrontEndPlugin object and refer instead to the top-level function
like this:
const extension: JupyterFrontEndPlugin<void> = {
  id: 'jupyterlab_apod',
  autoStart: true,
  requires: [ICommandPalette],
  activate: activate
};
Make sure you retain the export default extension; line in the file.
Now build the extension again and refresh the JupyterLab browser tab.
Run the Random Astronomy Picture command more than once without closing the
panel. The picture should update each time you execute the command. Close
the panel, run the command, and it should both reappear and show a new
image.
If anything is not working correctly, compare your code with the 04-refactor-and-refresh tag to debug. Once it is working properly, commit it.
git add .
git commit -m 'Refactor, refresh image'
Restore panel state when the browser refreshes
You may notice that every time you refresh your browser tab, the Astronomy Picture panel disappears, even if it was open before you refreshed. Other open panels, like notebooks, terminals, and text editors, all reappear and return to where you left them in the panel layout. You can make your extension behave this way too.
Update the imports at the top of your index.ts file so that the
entire list of import statements looks like the following:
import {
  ILayoutRestorer, JupyterFrontEnd, JupyterFrontEndPlugin
} from '@jupyterlab/application';

import {
  ICommandPalette, MainAreaWidget, WidgetTracker
} from '@jupyterlab/apputils';

import {
  Message
} from '@lumino/messaging';

import {
  Widget
} from '@lumino/widgets';
Then add the ILayoutRestorer interface to the JupyterFrontEndPlugin
definition. This addition passes the global LayoutRestorer as the
third parameter of the activate function.
const extension: JupyterFrontEndPlugin<void> = {
  id: 'jupyterlab_apod',
  autoStart: true,
  requires: [ICommandPalette, ILayoutRestorer],
  activate: activate
};
Finally, rewrite the activate function so that it:
- Declares a widget variable, but does not create an instance immediately.
- Constructs a
WidgetTrackerand tells theILayoutRestorerto use it to save/restore panel state. - Creates, tracks, shows, and refreshes the widget panel appropriately.
function activate(app: JupyterFrontEnd, palette: ICommandPalette, restorer: ILayoutRestorer) {
  console.log('JupyterLab extension jupyterlab_apod is activated!');

  // Declare a widget variable
  let widget: MainAreaWidget<APODWidget>;

  // Add an application command
  const command: string = 'apod:open';
  app.commands.addCommand(command, {
    label: 'Random Astronomy Picture',
    execute: () => {
      if (!widget || widget.isDisposed) {
        // Create a new widget if one does not exist
        // or if the previous one was disposed after closing the panel
        const content = new APODWidget();
        widget = new MainAreaWidget({content});
        widget.id = 'apod-jupyterlab';
        widget.title.label = 'Astronomy Picture';
        widget.title.closable = true;
      }
      if (!tracker.has(widget)) {
        // Track the state of the widget for later restoration
        tracker.add(widget);
      }
      if (!widget.isAttached) {
        // Attach the widget to the main work area if it's not there
        app.shell.add(widget, 'main');
      }
      widget.content.update();

      // Activate the widget
      app.shell.activateById(widget.id);
    }
  });

  // Add the command to the palette.
  palette.addItem({ command, category: 'Tutorial' });

  // Track and restore the widget state
  let tracker = new WidgetTracker<MainAreaWidget<APODWidget>>({
    namespace: 'apod'
  });
  restorer.restore(tracker, {
    command,
    name: () => 'apod'
  });
}
Rebuild your extension one last time and refresh your browser tab. Execute the Random Astronomy Picture command and validate that the panel appears with an image in it. Refresh the browser tab again. You should see an Astronomy Picture panel reappear immediately without running the command. Close the panel and refresh the browser tab. You should then not see an Astronomy Picture tab after the refresh.
The completed extension, showing the Astronomy Picture of the Day for 24 Jul 2015.
Refer to the 05-restore-panel-state tag if your extension is not working correctly. Make a commit when the state of your extension persists properly.
git add .
git commit -m 'Restore panel state'
Congratulations! You’ve implemented all of the behaviors laid out at the start of this tutorial. Now how about sharing it with the world?
Publish your extension to npmjs.org
npm is both a JavaScript package manager and the de facto registry for
JavaScript software. You can sign up for an account on the npmjs.com
site or create an account from the
command line by running npm adduser and entering values when
prompted. Create an account now if you do not already have one. If you
already have an account, login by running npm login and answering
the prompts.
Next, open the project package.json file in your text editor. Prefix
the name field value with @your-npm-username>/ so that the
entire field reads "name": "@your-npm-username/jupyterlab_apod" where
you’ve replaced the string your-npm-username with your real
username. Review the homepage, repository, license, and other supported
package.json fields while
you have the file open. Then open the README.md file and adjust the
command in the Installation section so that it includes the full,
username-prefixed package name you just included in the package.json
file. For example:
jupyter labextension install @your-npm-username/jupyterlab_apod
Return to your terminal window and make one more git commit:
git add .
git commit -m 'Prepare to publish package'
Now run the following command to publish your package:
npm publish --access=public
Check that your package appears on the npm website. You can either
search for it from the homepage or visit
https://www.npmjs.com/package/@your-username/jupyterlab_apod
directly. If it doesn’t appear, make sure you’ve updated the package
name properly in the package.json and run the npm command correctly.
Compare your work with the state of the reference project at the
06-prepare-to-publish
tag
for further debugging.
You can now try installing your extension as a user would. Open a new
terminal and run the following commands, again substituting your npm
username where appropriate
(make sure to stop the existing jupyter lab --watch command first):
conda create -n jupyterlab-apod jupyterlab nodejs
conda activate jupyterlab-apod
jupyter labextension install @your-npm-username/jupyterlab_apod
jupyter lab
You should see a fresh JupyterLab browser tab appear. When it does, execute the Random Astronomy Picture command to prove that your extension works when installed from npm.
Learn more
You’ve completed the tutorial. Nicely done! If you want to keep learning, here are some suggestions about what to try next:
- Add the image description that comes in the API response to the panel.
- Assign a default hotkey to the Random Astronomy Picture command.
- Make the image a link to the picture on the NASA website (URLs are of the form
https://apod.nasa.gov/apod/apYYMMDD.html). - Make the image title and description update after the image loads so that the picture and description are always synced.
- Give users the ability to pin pictures in separate, permanent panels.
- Add a setting for the user to put in their API key so they can make many more requests per hour than the demo key allows.
- Push your extension git repository to GitHub.
- Learn how to write other kinds of extensions.